Today we'll be installing Oracle 11g Database in Redhat Linux in Silent Mode. If we are using Silent mode installation, we have to use response file as input.
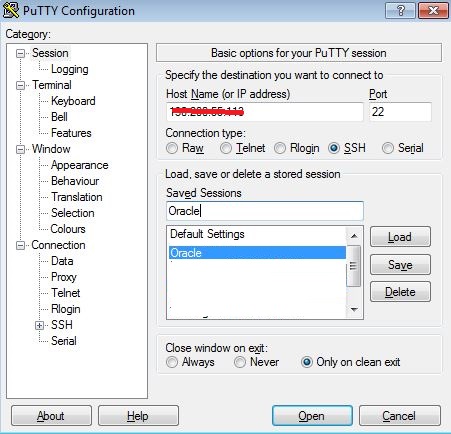
If we are installing DB using Putty or some SSH terminal, then we are not able to access UI for installation. In that case we have to use silent mode using response file.
Lets see how to configure Oracle 11g Enterprise Edition in remote machine.
Before proceeding with the installation, I assume that Java is already installed in machine.
1. Check the System information
Here the system is 64-bit as it is mentioned as x86_64. As per the system architecture, we will download respective Oracle 11g EE.
3. Go to Downloads tab and Select the Accept Licence Agreement radio button.
4. Once you select the Accept Licence Agreement, you'll get the message like below
5. Go to Oracle Database 11g Release 2 section, and download the respective files as per the system architecture. For our case, we'll download the files under Linux x86-64.
6. Once the download is completed, there will be 2 files
7. Go to the remote system, and execute the below command to install all the pre-requisites packages for Oracle 11g
1. wget http://public-yum.oracle.com/public-yum-ol6.repo
2. yum install oracle-rdbms-server-11gR2-preinstall
Note : If you are getting exception like GPG key retrieval failed: [Errno 14] curl#37 - "Couldn't open file /etc/pki/rpm-gpg/RPM-GPG-KEY-oracle" then in that case execute yum install --nogpgcheck oracle-rdbms-server-11gR2-preinstall
3. yum update
8. Once you execute the above command, it will install all the pre-requisite packages and automatically configure the Oracle 11g DB.
9. Edit the file /etc/sysctl.conf
and add the following lines if it does not exists –
fs.aio-max-nr = 1048576
fs.file-max
= 6815744
kernel.shmmni = 4096
# semaphores: semmsl, semmns,
semopm, semmni
kernel.sem = 250 32000 100 128
net.ipv4.ip_local_port_range = 9000
65500
net.core.rmem_default=262144
net.core.rmem_max=4194304
net.core.wmem_default=262144
net.core.wmem_max=1048586
If you made some changes to the above file, then execute /sbin/sysctl -p to change kernel parameters.
10. Edit the file /etc/security/limits.conf and add the following lines if it does not exists -
oracle soft nproc
2047
oracle hard nproc
16384
oracle soft nofile
4096
oracle hard nofile
65536
oracle soft stack
10240
11. Edit the file /etc/pam.d/login and add the following lines if it does not exists -
session required
pam_limits.so
12. Install the below mandatory packages -
make-3.80
binutils-2.15.92.0.2
gcc-3.4.6
libaio-0.3.105 (x86_64)
libaio-0.3.105 (i386)
glibc-2.3.4-2.41 (x86_64)
glibc-2.3.4-2.41 (i386)
compat-libstdc++-33-3.2.3 (x86_64)
compat-libstdc++-33-3.2.3 (i386)
elfutils-libelf-0.97
elfutils-libelf-devel-0.97
glibc-common-2.3.4
glibc-devel-2.3.4
glibc-headers-2.3.4
gcc-c++-3.4.6
libaio-devel-0.3.105 (x86_64)
libaio-devel-0.3.105 (i386)
libgcc-3.4.6 (x86_64)
libgcc-3.4.6
libstdc++-3.4.6 (x86_64)
libstdc++-3.4.6 (i386)
libstdc++-devel-3.4.6
sysstat-5.0.5
unixODBC-2.2.11 (x86_64)
unixODBC-2.2.11 (i386)
unixODBC-devel-2.2.11 (x86_64)
unixODBC-devel-2.2.11 (i386)
pdksh-5.2.14
expat-1.95.7
To install a package, execute yum install <package-name> or yum install --nogpgcheck <package-name>
13. Once the packages are installed/updated, create the new user and groups -
groupadd -g
54321 oinstall
groupadd -g
54322 dba
groupadd -g
54323 oper
useradd -g
oinstall -G dba,oper oracle
14. Now set the password oracle user
15. Set the secure linux to Permissive by editing /etc/selinux/config file -
SELINUX=permissive
Once the change is complete,restart the server or execute the following command to reflect the changes -
setenforce
Permissive
16. If Linux firewall is enabled, then disable the firewall by issuing the following command -
service
iptables stop
chkconfig
iptables off
17. Create the directories in which Oracle Software will be installed by executing following commands -
mkdir -p
/u01/app/oracle/product/11.2.0.4/db_1
chown -R
oracle:oinstall /u01
chmod -R 775 /u01
18. Add the following lines at the end of the /home/oracle/.bash_profile file
# Oracle 11g Settings
TMP=/tmp; export TMP
TMPDIR=$TMP; export TMPDIR
ORACLE_HOSTNAME=<system_ip>; export ORACLE_HOSTNAME
ORACLE_UNQNAME=<sid>; export ORACLE_UNQNAME
ORACLE_BASE=/u01/app/oracle; export ORACLE_BASE
ORACLE_HOME=$ORACLE_BASE/product/11.2.0.4/db_1; export ORACLE_HOME
ORACLE_SID=<sid>; export ORACLE_SID
ORACLE_TERM=xterm; export ORACLE_TERM
PATH=/usr/local/sbin:/usr/local/bin:/sbin:/bin:/usr/sbin:/usr/bin:/root/bin; export PATH
PATH=$PATH:$ORACLE_HOME/bin; export PATH
LD_LIBRARY_PATH=$ORACLE_HOME/lib:/lib:/usr/lib; export LD_LIBRARY_PATH
CLASSPATH=$ORACLE_HOME/JRE:$ORACLE_HOME/jlib:$ORACLE_HOME/rdbms/jlib; export CLASSPATH
JAVA_HOME=<java_home_path>; export JAVA_HOME
Change the value of highlighted attributes.
19. Add the entry of hostname in /etc/hosts file.
20. Login to Oracle user in separate terminal
21. Copy installer zip to /home/oracle and extract it
22. Once you unzip both the zip files, all files will be extracted to database folder
23. Give Read, Write and Execute permission to database folder.
24. Check the permission for .oui file in database/install. Give Read, Write and Execute permission to the file if it not there.
25. Download the response file from the below link and save it to /home/oracle
https://drive.google.com/file/d/0B2sK45HTTdS_ejRNNmhsdWRNQzQ/view
Update the values of following fields -
ORACLE_HOSTNAME,
oracle.install.db.config.starterdb.globalDBName
oracle.install.db.config.starterdb.SID
oracle.install.db.config.starterdb.password.SYS
oracle.install.db.config.starterdb.password.SYSTEM
oracle.install.db.config.starterdb.password.SYSMAN
oracle.install.db.config.starterdb.password.DBSNMP
26. Now go to /home/oracle/database and execute the runInstaller for installing Oracle 11g
./runInstaller -silent -responseFile /home/oracle/db_new.rsp
Note : Warnings can be ignored. Check the log file from the log location.
27. Once the installation is completed, you will get few instructions in the terminal. Follow the instructions -
28. To execute the configuration script, you need to login as
root user and execute the root.sh from the given location.
29. Once you execute the root.sh, go to the previous terminal and hit enter. After hitting enter, you will get message "
Successfully Setup Software." in the terminal.
30. Now verify whether your database is running or not
Here verify the
Hostname and
SID of Oracle DB.
31. Now test the Database connection using SQL Developer client
32. Enter Username, Password, Hostname, Port and SID to the connection window of SQL Developer and click on Test.
33. If you get Status as Success, Congratulations, you have successfully installed Oracle 11g EE. If you are not getting Success as Status then troubleshoot as per the error message you are getting.